5 - MetaMask
Introduction
Now that we know how cryptographic keys works, we can see how to use a cryptographic wallet. In this hands-on, we use MetaMask to make transactions on Ethereum.
What is MetaMask?
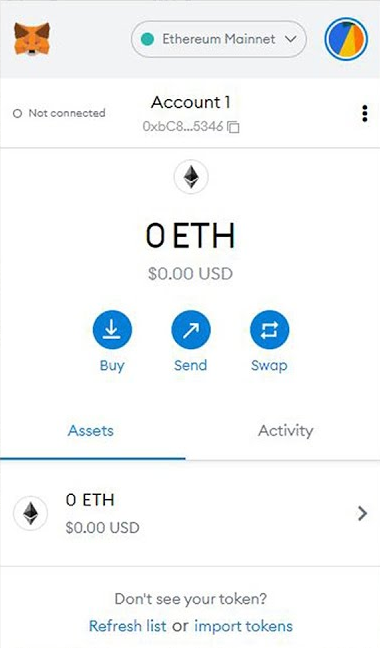
MetaMask 📖 is a browser plugin that serves as an Ethereum wallet. Users can store Ether and other tokens in the MetaMask wallet. The wallet can also be used to interact with decentralized applications, or dapps. MetaMask developpements are funded by Ethereum incubator ConsenSys 📖.
By connecting to Ethereum-based Dapps, users can spend their coins in games, stake tokens in gambling applications and trade them on decentralized exchanges. It also provides users with an entry point into the emerging world of decentralized finance, or DeFi, providing a way to access DeFi apps such as Compound 📖 and PoolTogether 📖.
Tutorial: How to setup MetaMask?
To use MetaMask, you will need either Chrome, a Chromium-based browser such as Brave, or Firefox.
We will go through this getting started tutorial 🎬 [02:00]
- First, you’ll need to download and install the official MetaMask extension/addon for your browser (either Google Chrome extension or Firefox addon depending on your browser).
- Once installed, you should see the below splash screen. Click the ‘Get Started’ button to begin creating your Ethereum wallet using MetaMask.
- On the next step, click the ‘Create a Wallet’ button.
- You’ll then be asked if you want to help improve MetaMask. Click ‘No Thanks’ if this doesn’t interest you, otherwise click ‘I agree’.
- Pick a password on the next step. This needs to be at least 8 characters long. We recommend using a completely unique password that hasn’t been used anywhere else, and contains a mixture of upper and lower case letters, symbols, and numbers. Read and accept the Terms of Use, and click ‘Create’ once your password has been set.
- MetaMask will then present you with your 12-word backup phrase. You’ll need to write this down in the same order displayed on your screen. This will be needed to recover your wallet should you ever lose access to your computer, and should be kept stored somewhere safe. Anybody who has access to your 12-word back phrase will be able to recover your funds, so keep it private. Click ‘Next’ once you’ve written this down.
- Confirm your backup phrase on the next screen by entering the words in the same order saved previously. Click ‘Confirm’ once done.
- You have now almost completed the MetaMask setup process. Just click ‘All Done’ on the final page, and you will be automatically logged in to MetaMask. If you ever get logged out, you’ll be able to log back in again by clicking the icon added to your web browser (usually found next to the URL bar).

Tutorial: How to make a transaction using MetaMask?
In order to submit a first transaction for free, we will use a testnet. Because each transaction implies fees, we need first to get some Ether from a faucet (a website that automate the sending of Ethers on testnets). In this tutorial, we will use either Göerli or Sepolia to get Test-Ether and start a transaction.
- First, switch the network to Goerli in Metamask
- Then try a faucet to get some Test-Ether. Beware, faucets are often down or slow because they work for free.
- Configure a second account in your MetaMaks
- Send a small amount of ether to this second account using the first one provided with Test Ether
Conclusion
In this lesson, we have installed the most used wallet on Ethereum and we have see how to use it on a testnet. In the next lesson, we see how to do it programmatically using NodeJS.
